# API Documentation
This is an extension for the catalog plugin that provides components to discover and display API entities.
APIs define the interface between components, see the [system model](https://backstage.io/docs/features/software-catalog/system-model) for details.
They are defined in machine readable formats and provide a human readable documentation.
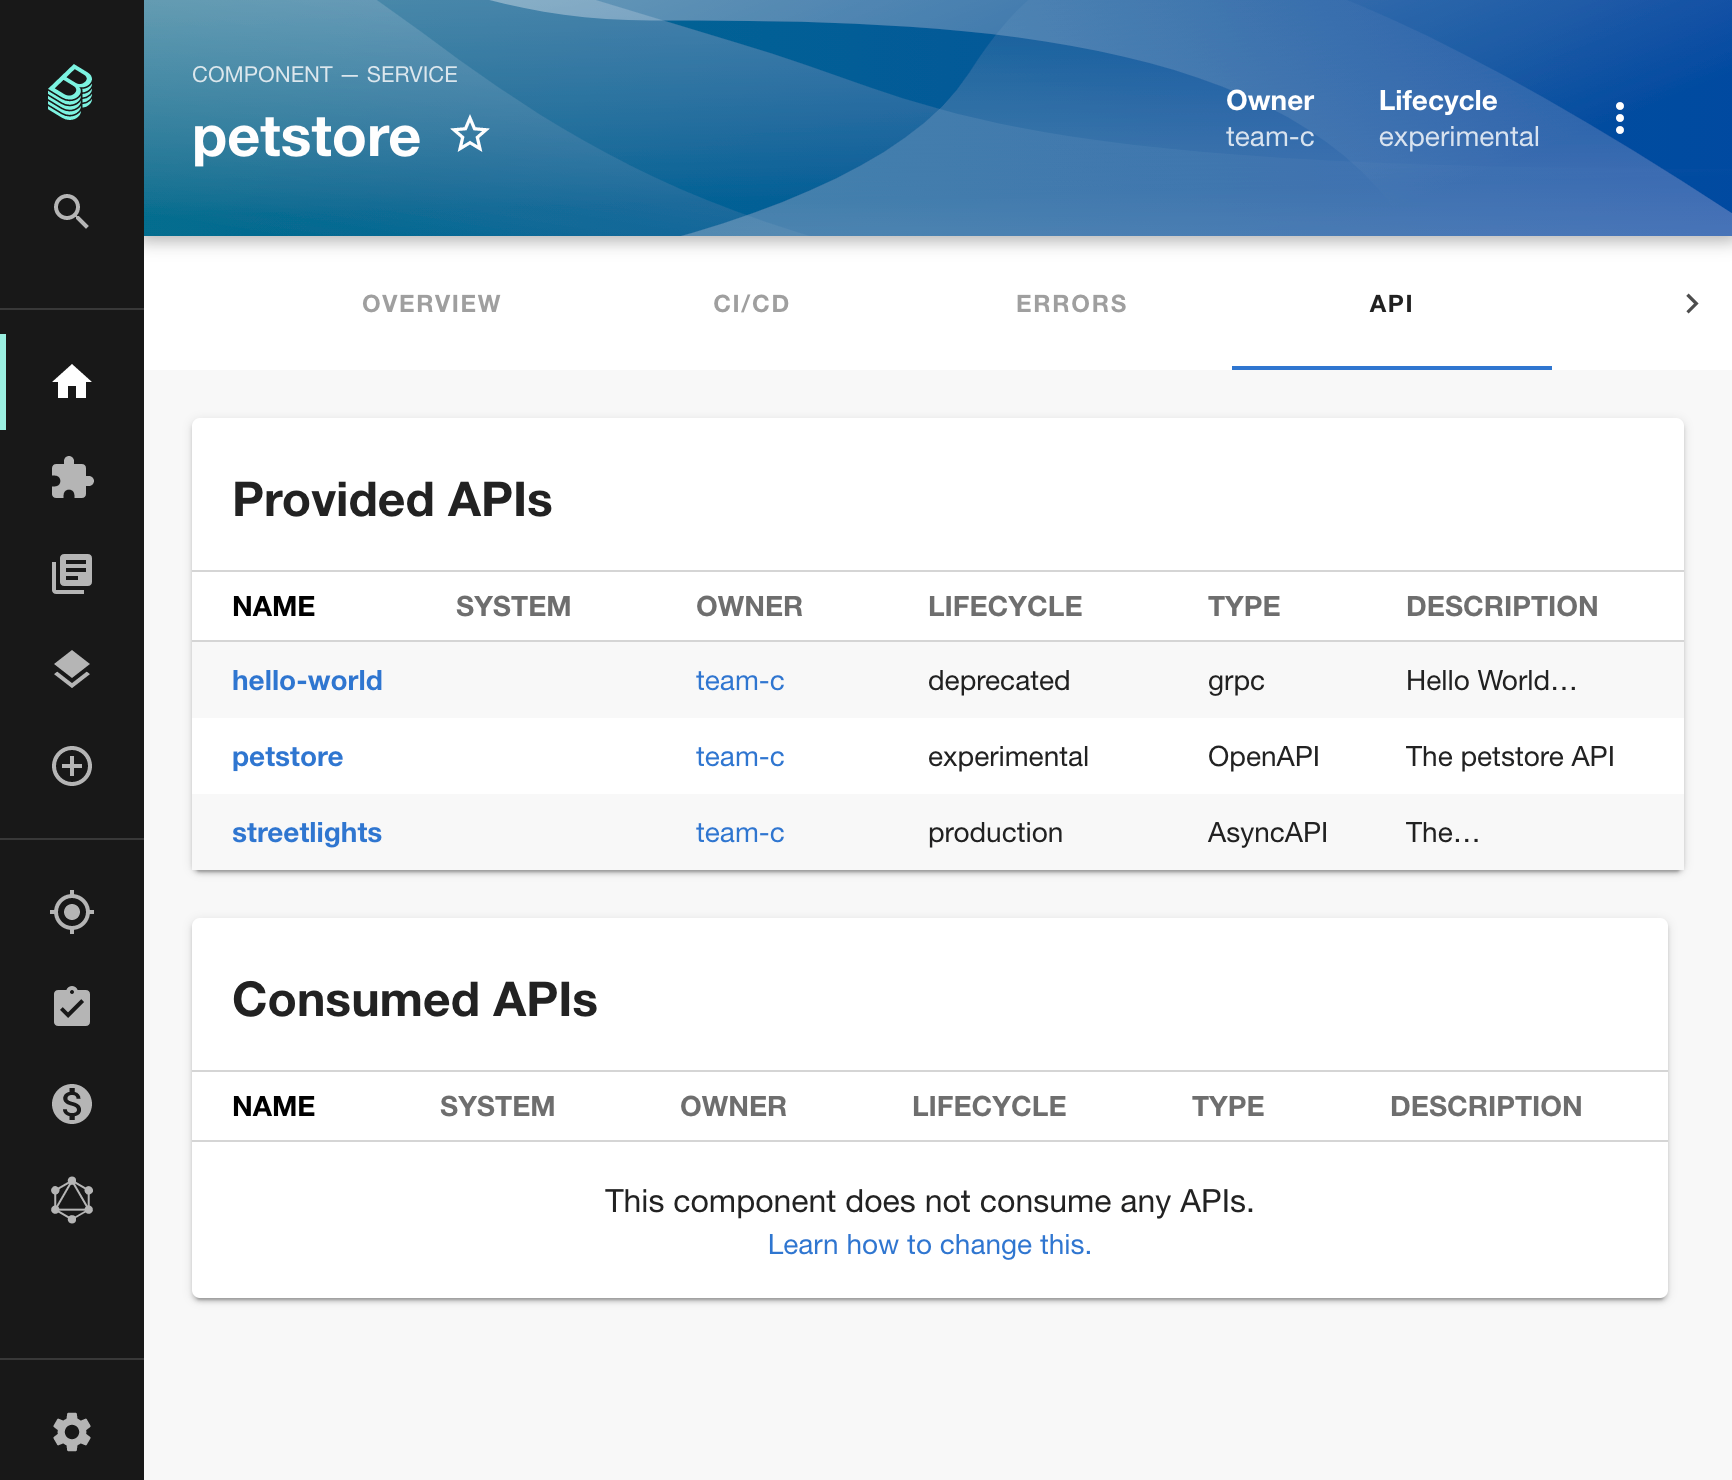
The plugin provides a standalone list of APIs, as well as an integration into the API tab of a catalog entity.
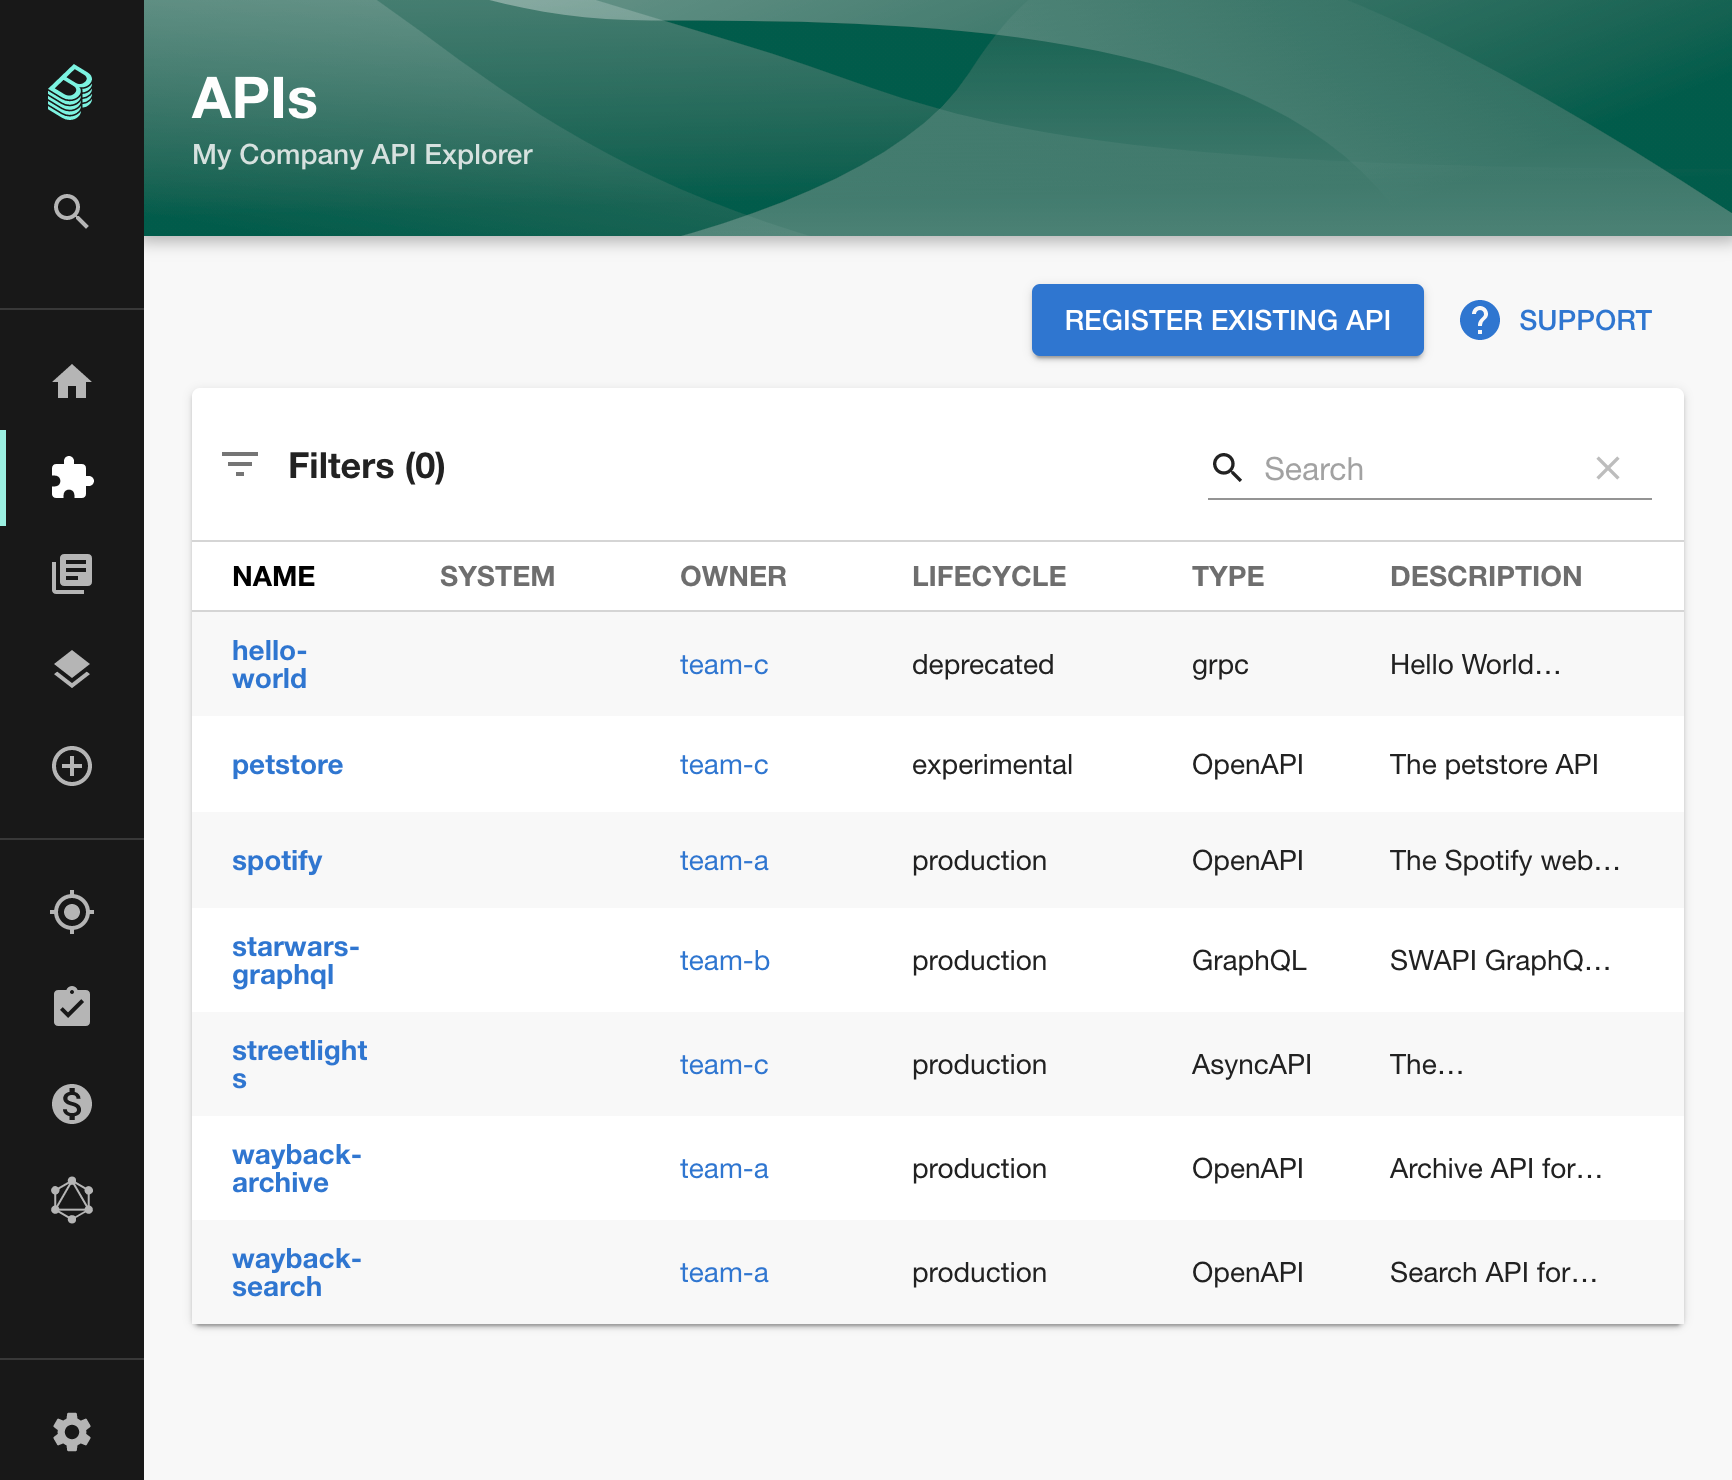

Right now, the following API formats are supported:
- [OpenAPI](https://swagger.io/specification/) 2 & 3
- [AsyncAPI](https://www.asyncapi.com/docs/reference/specification/latest) 2 & 3
- [GraphQL](https://graphql.org/learn/schema/)
Other formats are displayed as plain text, but this can easily be extended.
To fill the catalog with APIs, [provide entities of kind API](https://backstage.io/docs/features/software-catalog/descriptor-format#kind-api).
To link that a component provides or consumes an API, see the [`providesApis`](https://backstage.io/docs/features/software-catalog/descriptor-format#specprovidesapis-optional) and [`consumesApis`](https://backstage.io/docs/features/software-catalog/descriptor-format#specconsumesapis-optional) properties on the Component kind.
## Getting Started
> The plugin is already added when using `npx @backstage/create-app` so you can skip these steps.
```bash
# From your Backstage root directory
yarn --cwd packages/app add @backstage/plugin-api-docs
```
Once installed, the plugin is automatically available in your app through the default feature discovery. For more details and alternative installation methods, see [installing plugins](https://backstage.io/docs/frontend-system/building-apps/installing-plugins).
You can enable entity cards and tabs on the catalog entity page through configuration:
```yaml
# app-config.yaml
app:
extensions:
- entity-card:api-docs/providing-components:
config:
filter:
kind: api
- entity-card:api-docs/consuming-components:
config:
filter:
kind: api
- entity-content:api-docs/definition
- entity-content:api-docs/apis
```
For the full list of available extensions and their configuration options, see the [README-alpha.md](./README-alpha.md).
## Customizations
### Custom API Renderings
You can add support for additional API types by providing a custom implementation for the `apiDocsConfigRef`.
You can also use this to override the rendering of one of the already supported types.
This is an example with a made-up renderer for SQL schemas:
```tsx
// packages/app/src/apis.tsx
import { ApiEntity } from '@backstage/catalog-model';
import {
ApiDefinitionWidget,
apiDocsConfigRef,
defaultDefinitionWidgets,
} from '@backstage/plugin-api-docs';
import { SqlRenderer } from '...';
// ...
export const apis: AnyApiFactory[] = [
// ...
createApiFactory({
api: apiDocsConfigRef,
deps: {},
factory: () => {
// load the default widgets
const definitionWidgets = defaultDefinitionWidgets();
return {
getApiDefinitionWidget: (apiEntity: ApiEntity) => {
// custom rendering for sql
if (apiEntity.spec.type === 'sql') {
return {
type: 'sql',
title: 'SQL',
component: definition => ,
} as ApiDefinitionWidget;
}
// fallback to the defaults
return definitionWidgets.find(d => d.type === apiEntity.spec.type);
},
};
},
}),
];
```
### Implementing OAuth 2 Authorization Code flow with Swagger UI
#### Adding `oauth2-redirect.html` to support OAuth2 `redirect_uri` route
The Swagger UI package by expects to have a route to `/oauth2-redirect.html` which processes
the redirect callback for the OAuth2 Authorization Code flow, however, this file is not installed
by this plugin.
Grab a copy of [`oauth2-redirect.html`](https://github.com/swagger-api/swagger-ui/blob/master/dist/oauth2-redirect.html)
and put it in the `app/public/` directory in order to enable Swagger UI to complete this redirection.
This also may require you to adjust `Content Security Policy` header settings of your Backstage application, so that the script in `oauth2-redirect.html` can be executed. Since the script is static we can add the hash of it directly to our CSP policy, which we do by adding the following to the `csp` section of the app configuration:
```yaml
script-src:
- "'self'"
- "'unsafe-eval'" # this is required for scaffolder usage, and ajv validation.
- "'sha256-GeDavzSZ8O71Jggf/pQkKbt52dfZkrdNMQ3e+Ox+AkI='" # oauth2-redirect.html
```
#### Configuring your OAuth2 Client
You'll need to make sure your OAuth2 client has been registered in your OAuth2 Authentication Server (AS)
with the appropriate `redirect_uris`, `scopes` and `grant_types`. For example, if your AS supports
the [OAuth 2.0 Dynamic Client Registration Protocol](https://tools.ietf.org/html/rfc7591), an example
POST request body would look like this:
```json
{
"client_name": "Example Backstage api-docs plugin Swagger UI Client",
"redirect_uris": [
"https://www.getpostman.com/oauth2/callback",
"http://localhost:3000/oauth2-redirect.html"
"https:///oauth2-redirect.html"
],
"scope": "read_pets write_pets",
"grant_types": [
"authorization_code"
]
}
```
The above `redirect_uris` are:
- [Postman](https://www.postman.com/) testing: `https://www.getpostman.com/oauth2/callback`
- Local Backstage app development: `http://localhost:3000/oauth2-redirect.html`
- Backstage app production: `https:///oauth2-redirect.html`
#### Configuring OAuth2 in your OpenAPI 3.0 schema
To configure [OAuth 2 Authorization Code](https://swagger.io/docs/specification/authentication/oauth2/) flow
in your OpenAPI 3.0 schema you'll need something like this snippet:
```yaml
components:
securitySchemes:
oauth:
type: oauth2
description: OAuth2 service
flows:
authorizationCode:
authorizationUrl: https://api.example.com/oauth2/authorize
tokenUrl: https://api.example.com/oauth2/token
scopes:
read_pets: read your pets
write_pets: modify pets in your account
security:
oauth:
- [read_pets, write_pets]
```
### Adding `requestInterceptor` to Swagger UI
To configure a [`requestInterceptor` for Swagger UI](https://github.com/swagger-api/swagger-ui/tree/master/flavors/swagger-ui-react#requestinterceptor-proptypesfunc) you'll need to add the following to your `api.tsx`:
```tsx
...
import { OpenApiDefinitionWidget, apiDocsConfigRef, defaultDefinitionWidgets } from '@backstage/plugin-api-docs';
import { ApiEntity } from '@backstage/catalog-model';
export const apis: AnyApiFactory[] = [
...
createApiFactory({
api: apiDocsConfigRef,
deps: {},
factory: () => {
// Overriding openapi definition widget to add header
const requestInterceptor = (req: any) => {
req.headers.append('myheader', 'wombats');
return req;
};
const definitionWidgets = defaultDefinitionWidgets().map(obj => {
if (obj.type === 'openapi') {
return {
...obj,
component: (definition) => ,
}
}
return obj;
});
return {
getApiDefinitionWidget: (apiEntity: ApiEntity) => {
return definitionWidgets.find(d => d.type === apiEntity.spec.type);
},
};
},
})
```
In the same way as the `requestInterceptor` you can override any property of Swagger UI
### Provide Specific Supported Methods to Swagger UI
This can be done through utilising the
[supportedSubmitMethods prop](https://github.com/swagger-api/swagger-ui/tree/master/flavors/swagger-ui-react#supportedsubmitmethods-proptypesarrayofproptypesoneofget-put-post-delete-options-head-patch-trace).
If you wish to limit the HTTP methods available for the `Try It Out` feature of an OpenAPI API
component, you will need to add the following to your `api.tsx`, listing the permitted methods for
your API in the `supportedSubmitMethods` parameter:
```tsx
...
import {
OpenApiDefinitionWidget,
apiDocsConfigRef,
defaultDefinitionWidgets,
} from '@backstage/plugin-api-docs';
import { ApiEntity } from '@backstage/catalog-model';
export const apis: AnyApiFactory[] = [
...
createApiFactory({
api: apiDocsConfigRef,
deps: {},
factory: () => {
const supportedSubmitMethods = ['get', 'post', 'put', 'delete'];
const definitionWidgets = defaultDefinitionWidgets().map(obj => {
if (obj.type === 'openapi') {
return {
...obj,
component: definition => (
),
};
}
return obj;
});
return {
getApiDefinitionWidget: (apiEntity: ApiEntity) => {
return definitionWidgets.find(d => d.type === apiEntity.spec.type);
}
};
}
})
]
```
N.B. if you wish to disable the `Try It Out` feature for your API, you can provide an empty list to
the `supportedSubmitMethods` parameter.
### Custom Resolvers for AsyncApi
You can override the default http/https resolvers, for example to add authentication to requests to internal schema registries by providing the `resolvers` prop to the `AsyncApiDefinitionWidget`. This is an example:
```tsx
...
import {
AsyncApiDefinitionWidget,
apiDocsConfigRef,
defaultDefinitionWidgets,
} from '@backstage/plugin-api-docs';
import { ApiEntity } from '@backstage/catalog-model';
export const apis: AnyApiFactory[] = [
...
createApiFactory({
api: apiDocsConfigRef,
deps: {},
factory: () => {
const myCustomResolver = {
schema: 'https',
order: 1,
canRead: true,
async read(uri: any) {
const response = await fetch(request, {
headers: {
X-Custom: 'Custom',
},
});
return response.text();
},
};
const definitionWidgets = defaultDefinitionWidgets().map(obj => {
if (obj.type === 'asyncapi') {
return {
...obj,
component: (definition) => (
),
};
}
return obj;
});
return {
getApiDefinitionWidget: (apiEntity: ApiEntity) => {
return definitionWidgets.find(d => d.type === apiEntity.spec.type);
},
};
}
})
]
```
### Pagination
You can add pagination support to `ApiExplorerPage` extension.
This is an example:
```tsx
// In packages/app/src/App.tsx
import { ApiExplorerPage } from '@backstage/plugin-api-docs';
}
/>;
```
## Troubleshooting
### "Try it out" sends requests to the wrong host
If the **Try it out** feature in the OpenAPI widget sends requests to your Backstage app's URL instead of the actual API host, the OpenAPI spec is missing a `servers` entry.
When no `servers` field is present, Swagger UI falls back to `window.location.origin` — the current page's host — as the base URL for all requests.
**Fix**: add a `servers` field to your API entity's `spec.definition`:
```yaml
# catalog-info.yaml
apiVersion: backstage.io/v1alpha1
kind: API
metadata:
name: my-api
spec:
type: openapi
definition: |
openapi: "3.0.0"
info:
title: My API
version: v1
servers:
- url: https://api.example.com/v1 # ← specify your api base URL
```
If you cannot modify the spec (e.g. it is generated or fetched from an external source), you can work around this by adding a `requestInterceptor` that rewrites the URL — see [Adding `requestInterceptor` to Swagger UI](#adding-requestinterceptor-to-swagger-ui) above.
## Old Frontend System
If your Backstage app uses the old frontend system, you need to manually wire the plugin into your app as outlined in this section. If you are on the new frontend system, you can skip this.
1. Add the `ApiExplorerPage` extension to the app:
```tsx
// In packages/app/src/App.tsx
import { ApiExplorerPage } from '@backstage/plugin-api-docs';
} />;
```
2. Add one of the provided widgets to the EntityPage:
```tsx
// packages/app/src/components/catalog/EntityPage.tsx
import {
EntityAboutCard,
EntityApiDefinitionCard,
EntityConsumingComponentsCard,
EntityProvidingComponentsCard,
} from '@backstage/plugin-api-docs';
const apiPage = (
);
// ...
export const entityPage = (
// ...
// ...
);
```
There are other components to discover in [`./src/components`](./src/components) that are also added by the default app.
## Links
- [The Backstage homepage](https://backstage.io)